Lab Summary & Specifications
This complete hands-on lab demonstrates building a production-style, dual-server environment on Amazon Lightsail, placing both instances behind a managed Lightsail Load Balancer, validating target health checks, and proving automated traffic distribution across backends.
| Parameter |
Configuration |
| Region |
Mumbai (ap-south-1) |
| Instance 01 |
lightsail-app-01 (15.206.146.237, Ubuntu 24.04.4 LTS) |
| Instance 02 |
lightsail-app-02 (3.110.161.220, Ubuntu 24.04.4 LTS) |
| Operating System |
Ubuntu 24.04.4 LTS (Noble Numbat) |
| Web Server |
Nginx |
| Load Balancer |
lightsail-production-lb (HTTP :80) |
Completed Workflow:
Create app-01 ➔ Create app-02 ➔ Install Nginx ➔ Customize responses ➔ Create Load Balancer ➔ Attach targets ➔ Verify health ➔ Test traffic.
1. Architecture Overview
The architecture features a single public entry point and two independent backend targets. The Load Balancer receives incoming HTTP requests on port 80 and forwards them to healthy Lightsail Ubuntu instances running Nginx.
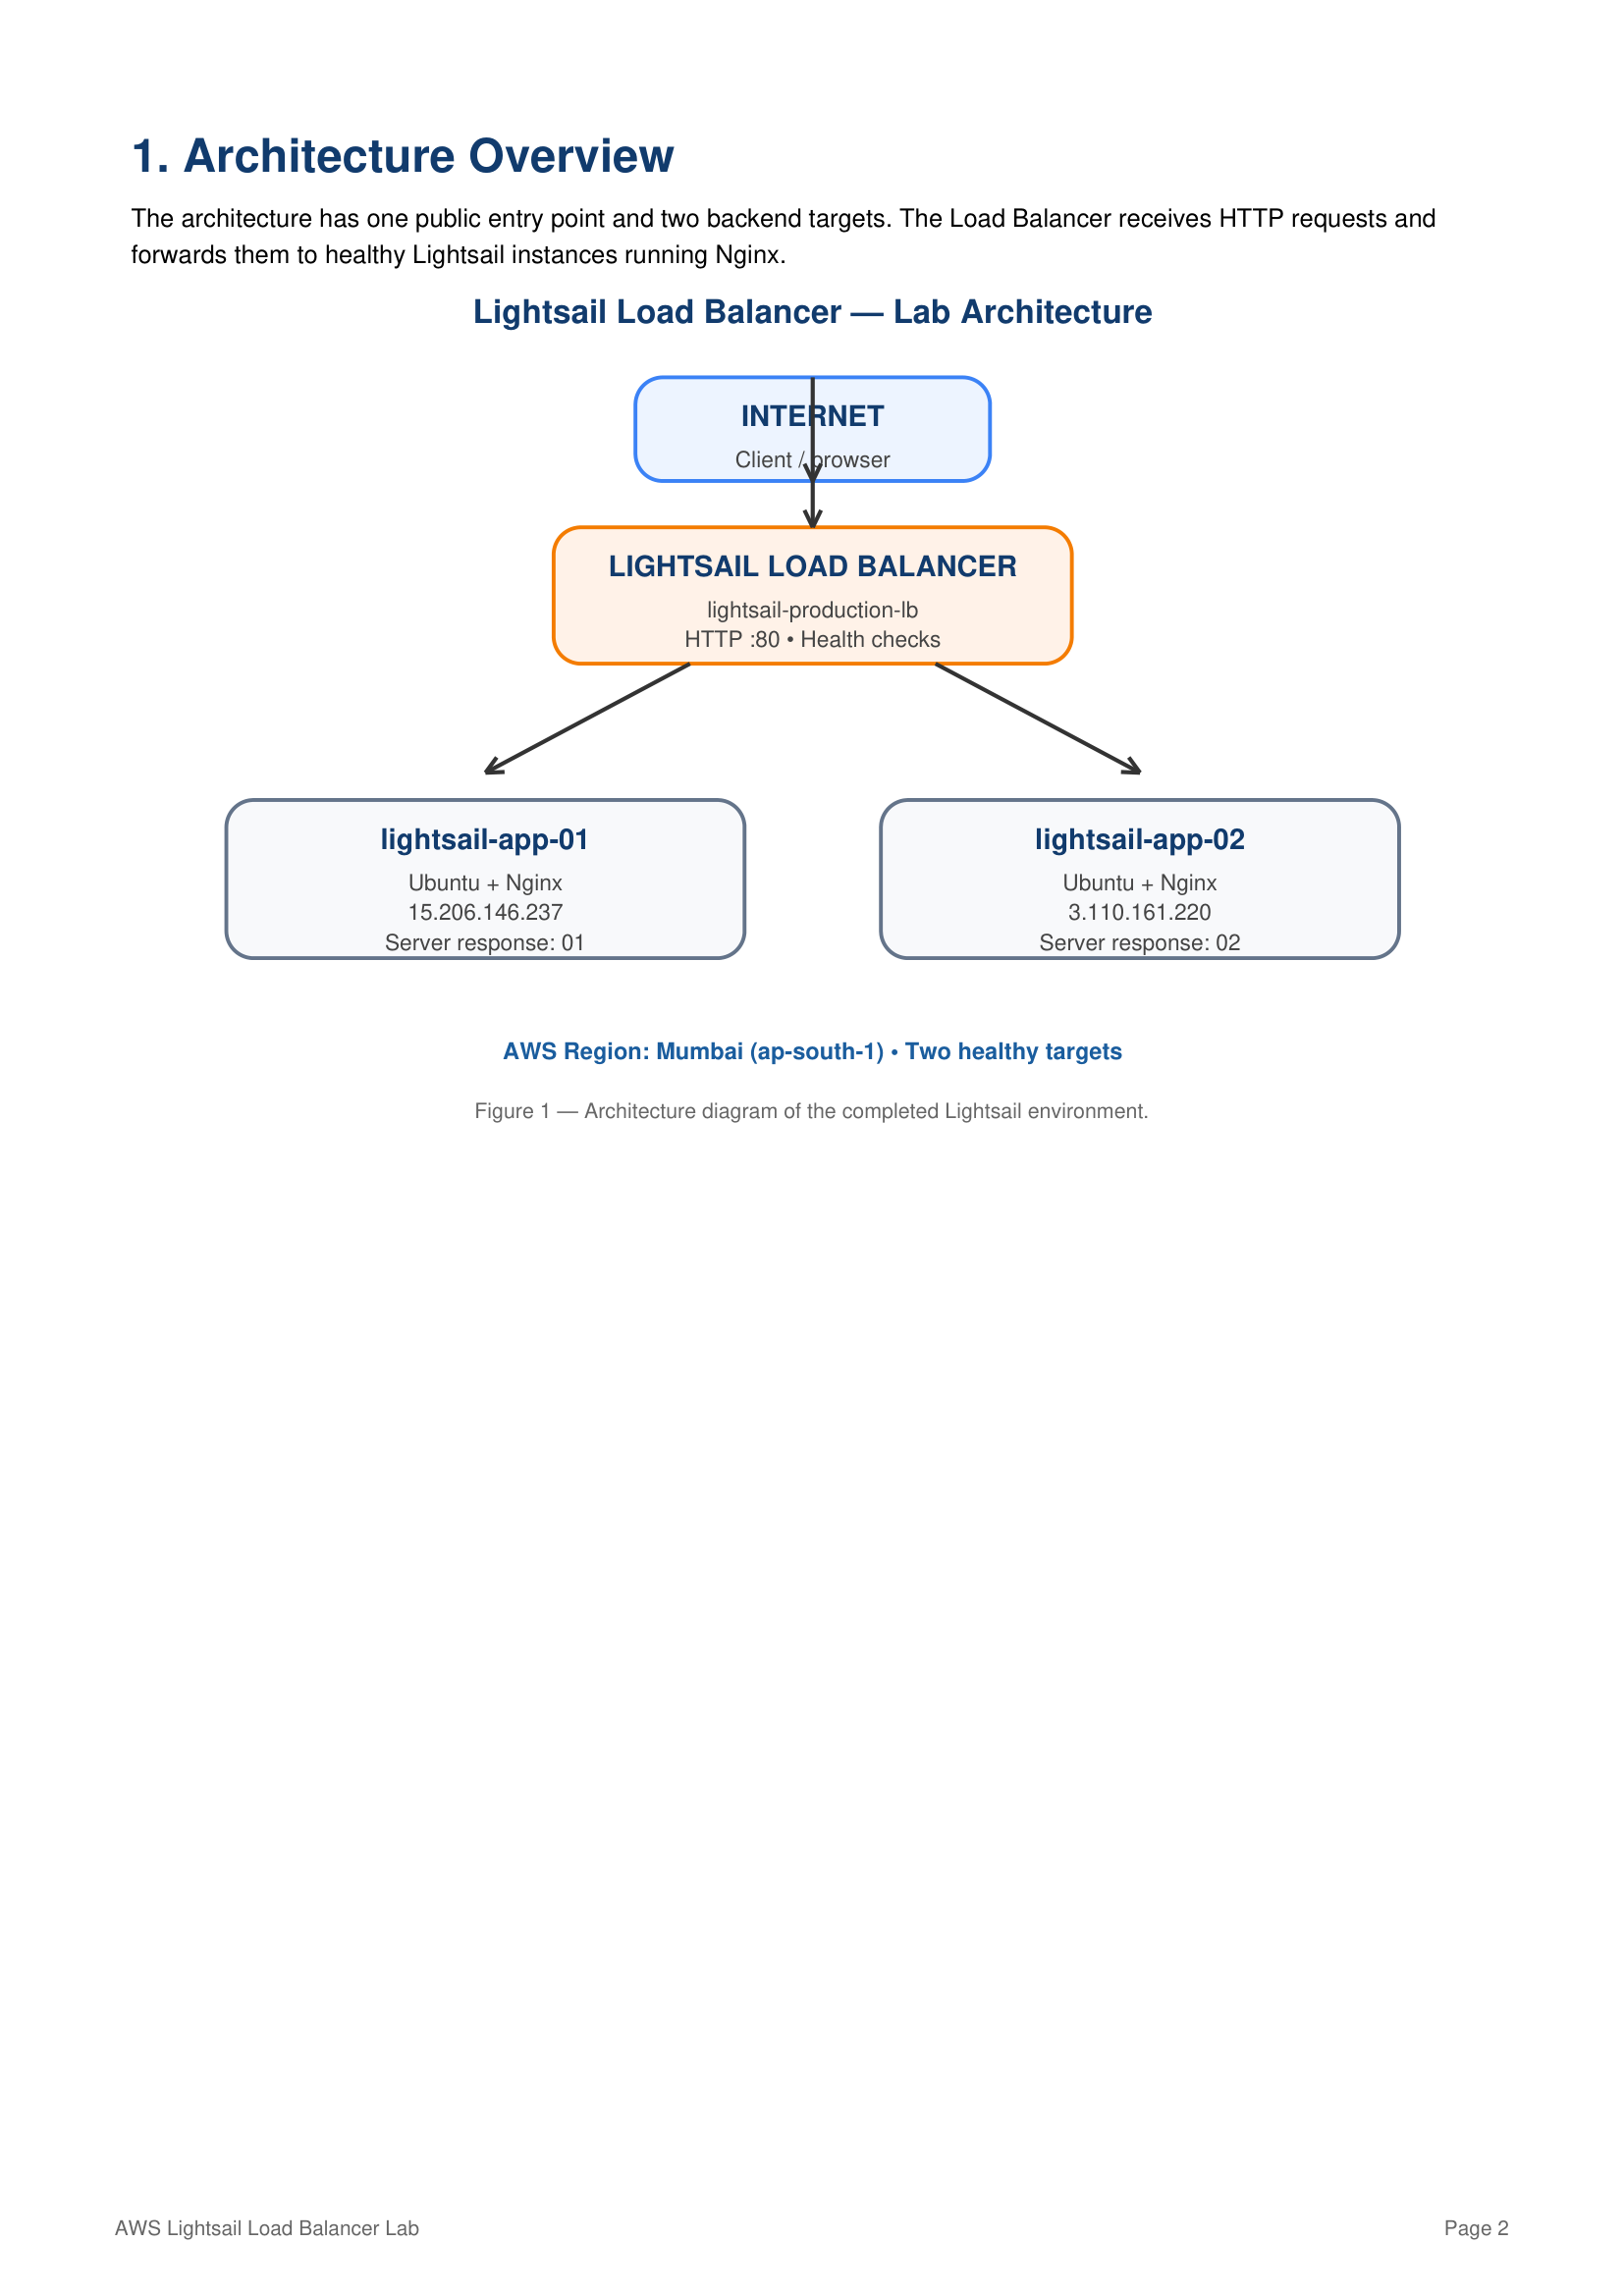 Figure 1 — Architecture diagram of the completed Lightsail environment.
                           ┌────────────────────────┐
                           │  INTERNET / Client     │
                           └───────────┬────────────┘
                                       │
                                       ▼
                     ┌──────────────────────────────────┐
                     │    LIGHTSAIL LOAD BALANCER       │
                     │    lightsail-production-lb       │
                     │    HTTP :80 • Health checks      │
                     └─────────┬──────────────┬─────────┘
                               │              │
                    ┌──────────▼──┐        ┌──▼──────────┐
                    │             │        │             │
        ┌───────────┴──────────┐  │   ┌────┴───────────┴─────────┐
        │ lightsail-app-01     │  │   │ lightsail-app-02         │
        │ Ubuntu + Nginx       │  │   │ Ubuntu + Nginx           │
        │ 15.206.146.237       │  │   │ 3.110.161.220            │
        │ Server response: 01  │  │   │ Server response: 02      │
        └──────────────────────┘  │   └──────────────────────────┘
                                  ▼
                     AWS Region: Mumbai (ap-south-1)
2. Create the First Ubuntu Instance — lightsail-app-01
In Lightsail, launch a Linux/Unix instance using the Ubuntu OS-Only blueprint. The first server is named lightsail-app-01 and is deployed in Mumbai, Zone A (ap-south-1a).
- Plan: 512 MB RAM, 2 vCPUs, 20 GB SSD
- Public IPv4:
15.206.146.237
- Private IPv4:
172.26.14.33
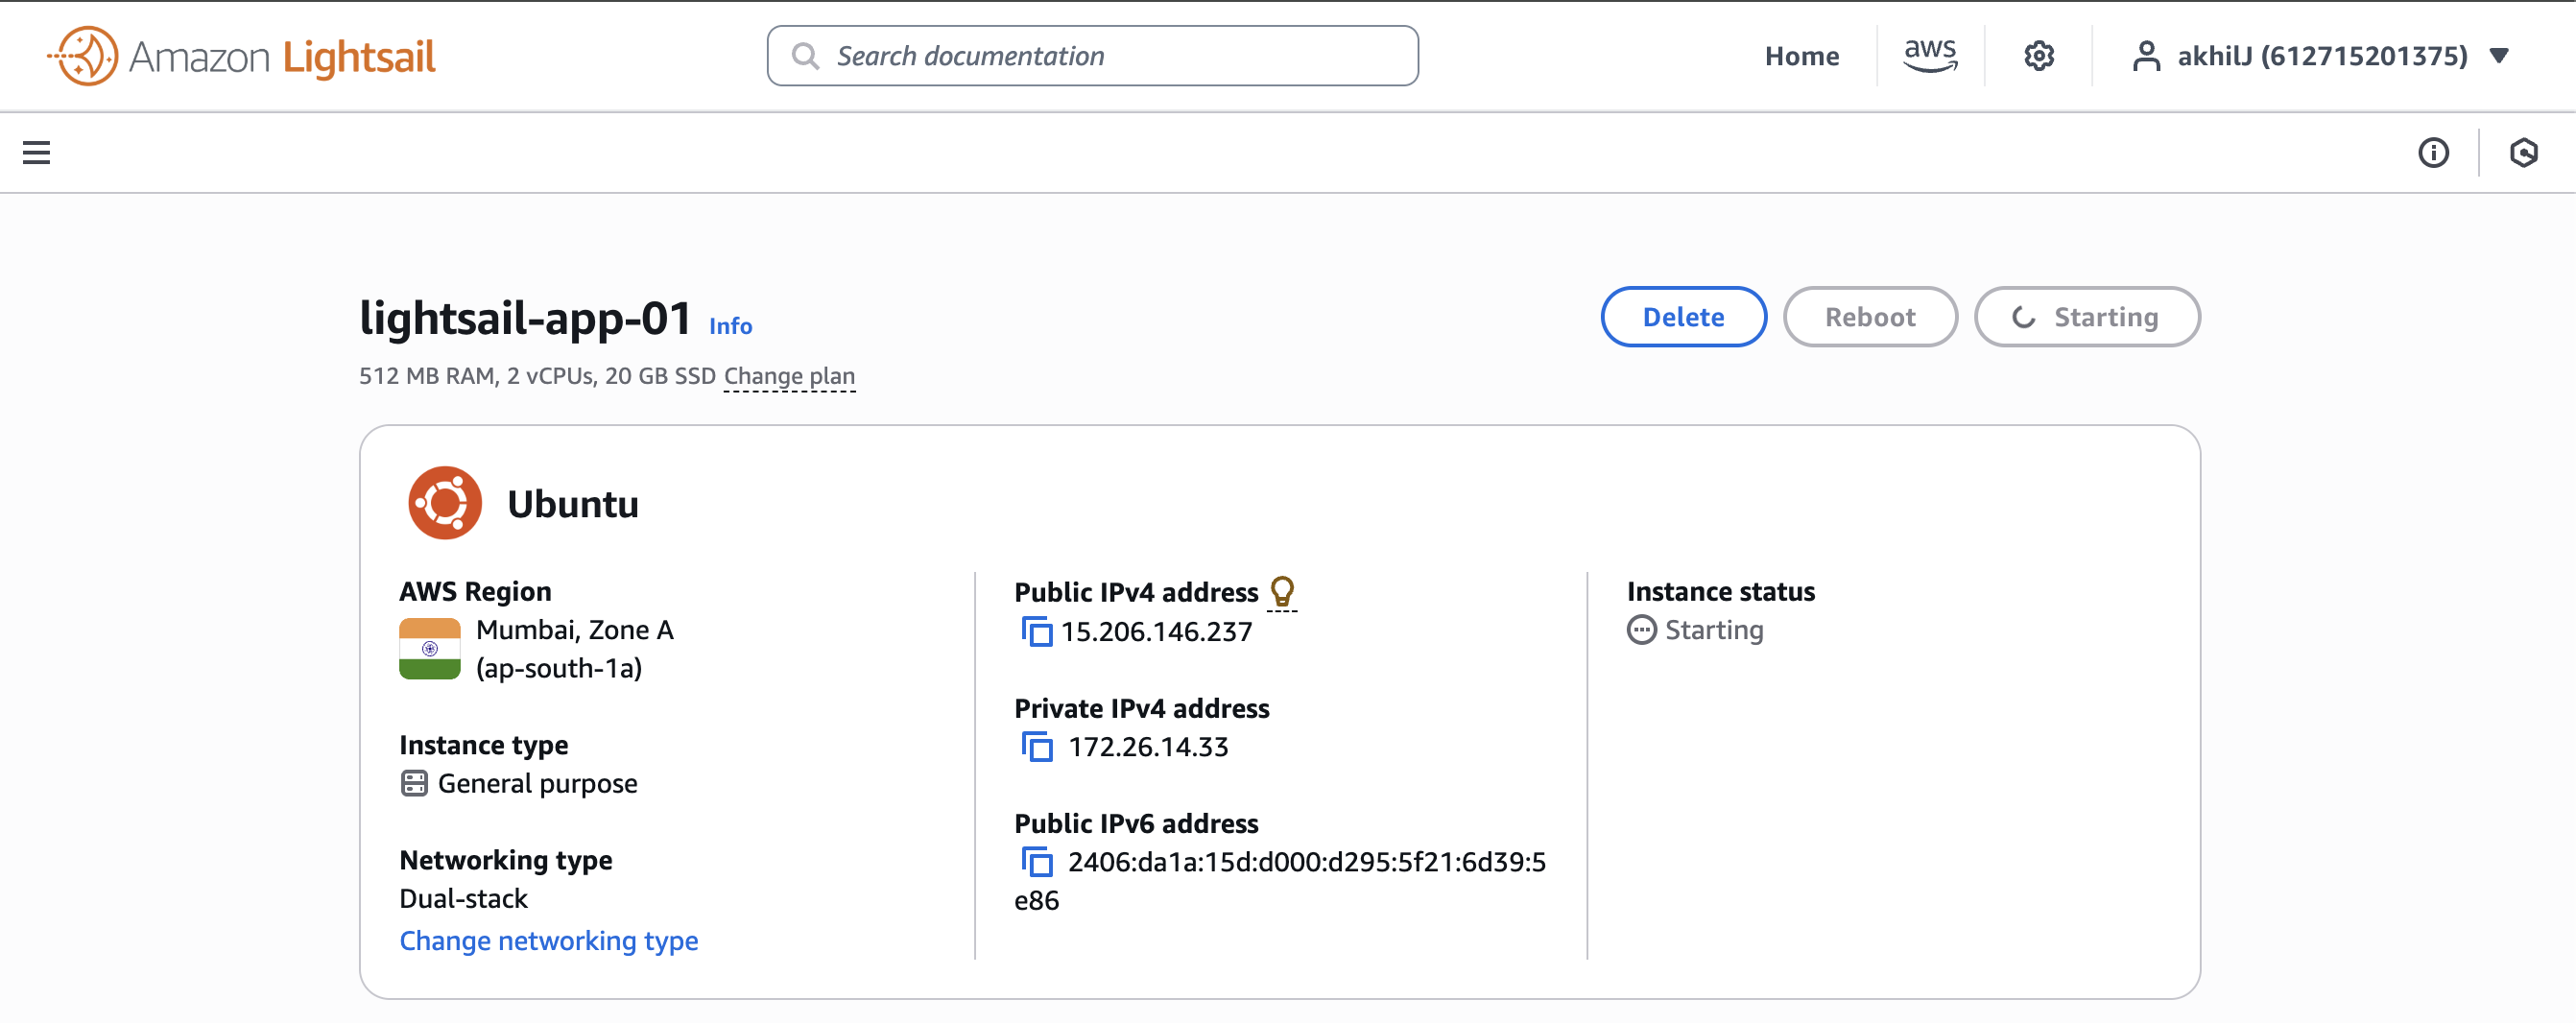 Figure 2 —
 lightsail-app-01 instance details captured from the AWS Lightsail console.
3. Create the Second Ubuntu Instance — lightsail-app-02
Repeat the Lightsail instance creation process for a second backend server. Select Linux/Unix ➔ OS Only ➔ Ubuntu, choose the Mumbai region, and name the instance lightsail-app-02.
Purpose of the Second Instance:
It acts as the second independent backend target. Having two servers allows the Load Balancer to distribute traffic evenly and demonstrates automated health-check-based failover.
| Property |
Value |
| Name |
lightsail-app-02 |
| Platform |
Linux/Unix |
| Blueprint |
Ubuntu 24.04 LTS |
| Region |
Mumbai (ap-south-1) |
| Plan |
512 MB RAM • 2 vCPUs • 20 GB SSD |
| Public IPv4 |
3.110.161.220 |
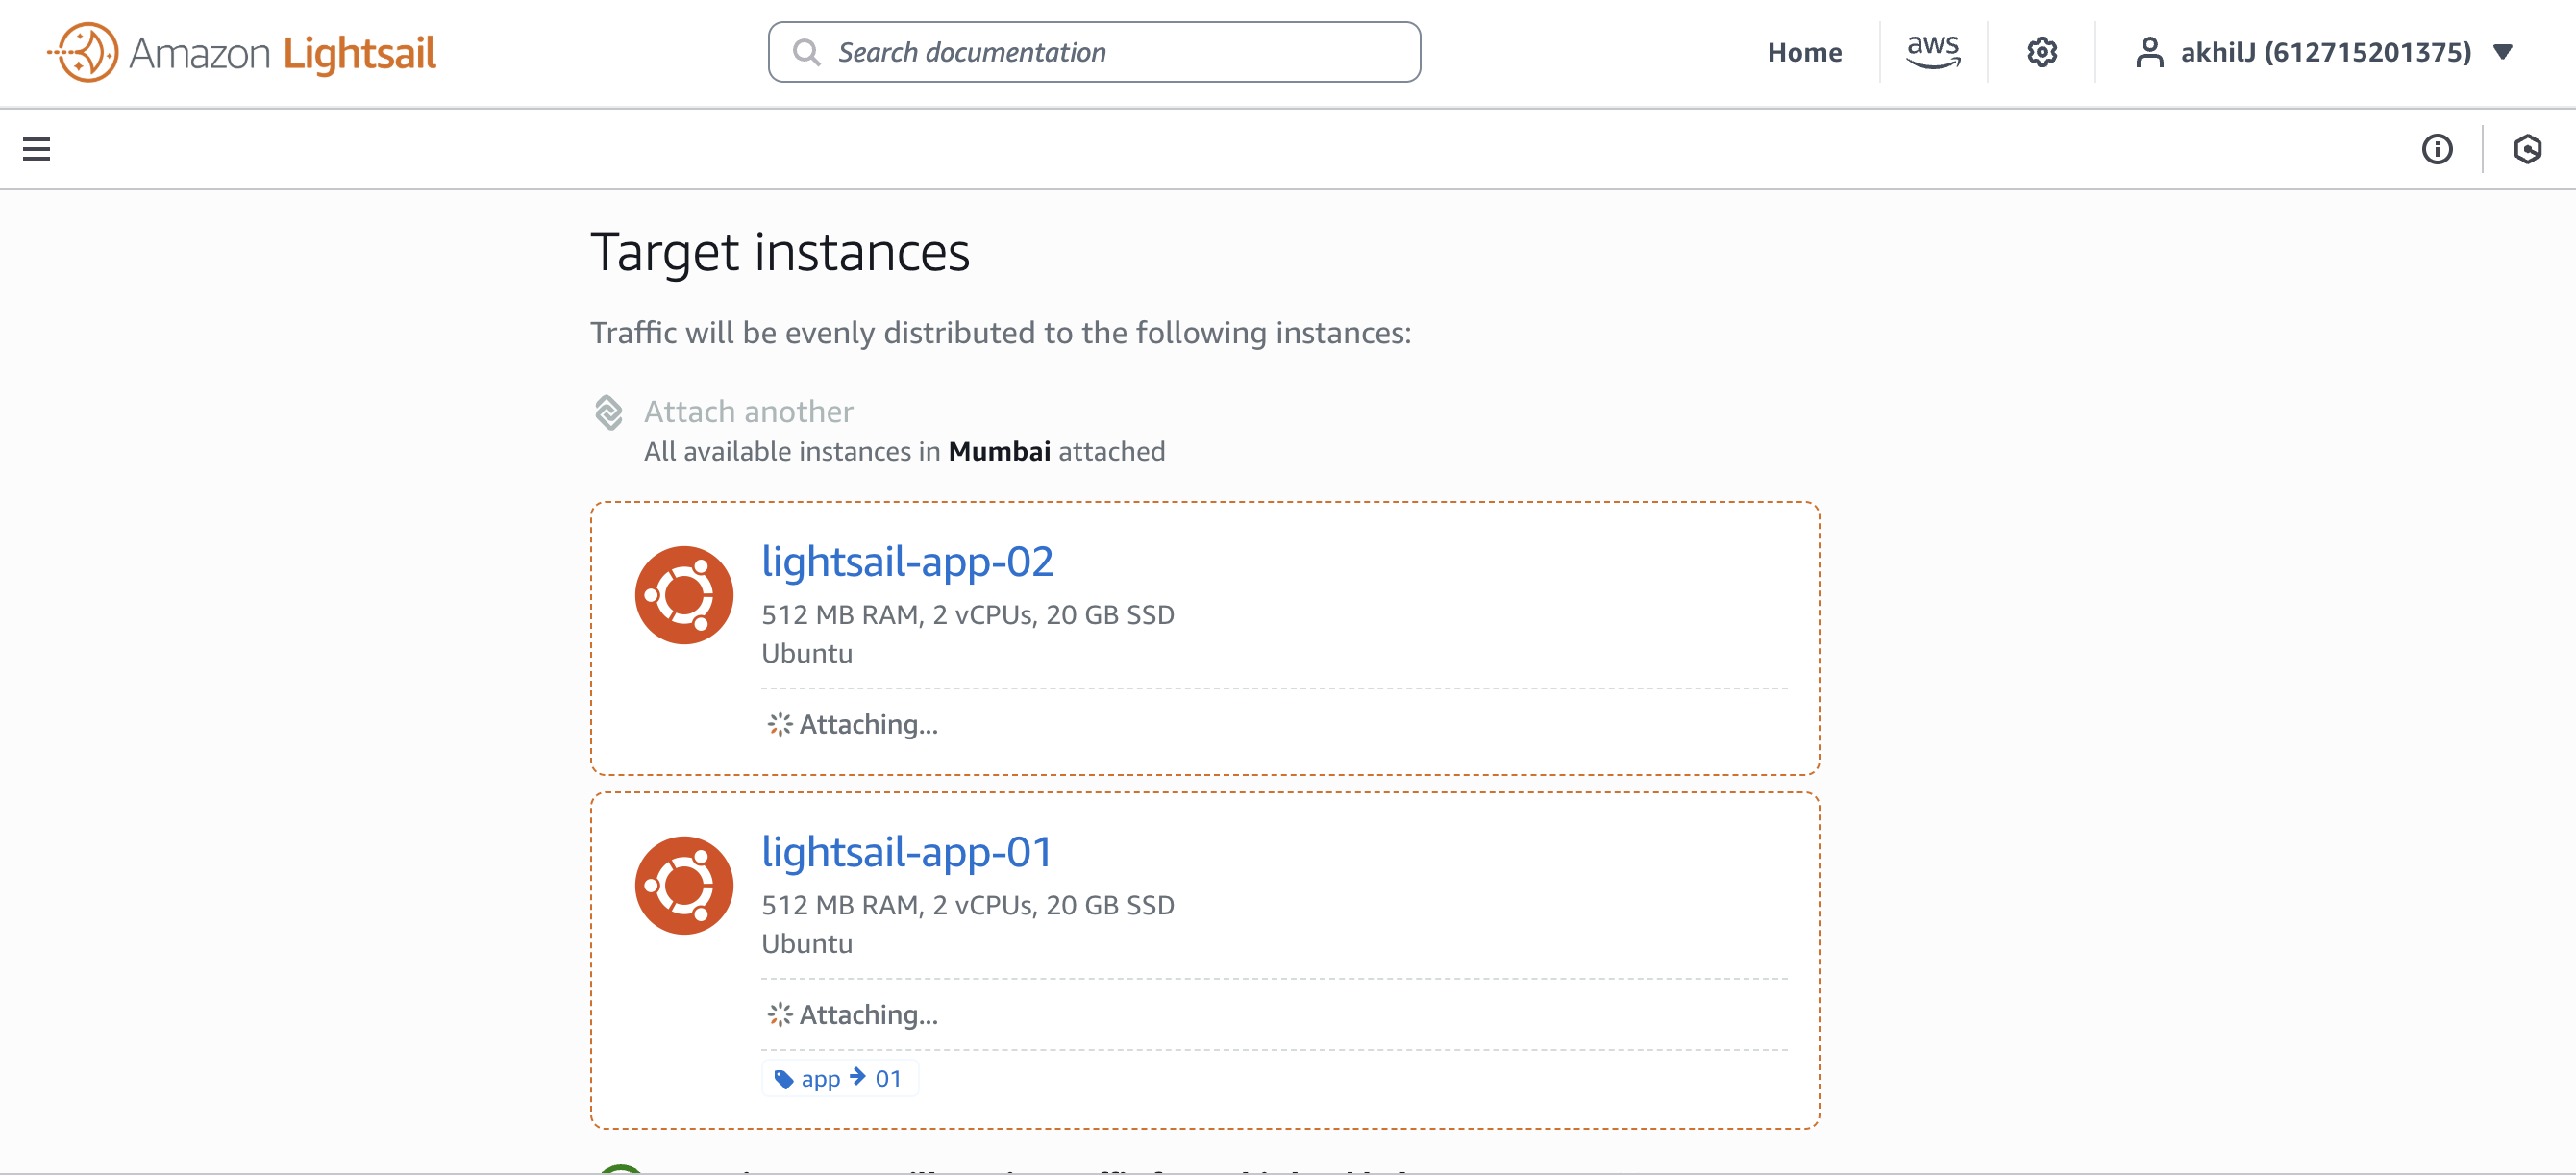 Figure 3 — Captured evidence of
 lightsail-app-02 after creation, when it is attached as a Load Balancer target.
4. Verify the Ubuntu Server via SSH
Connect to the instance through Lightsail's browser-based SSH terminal and verify the host and operating-system baseline.
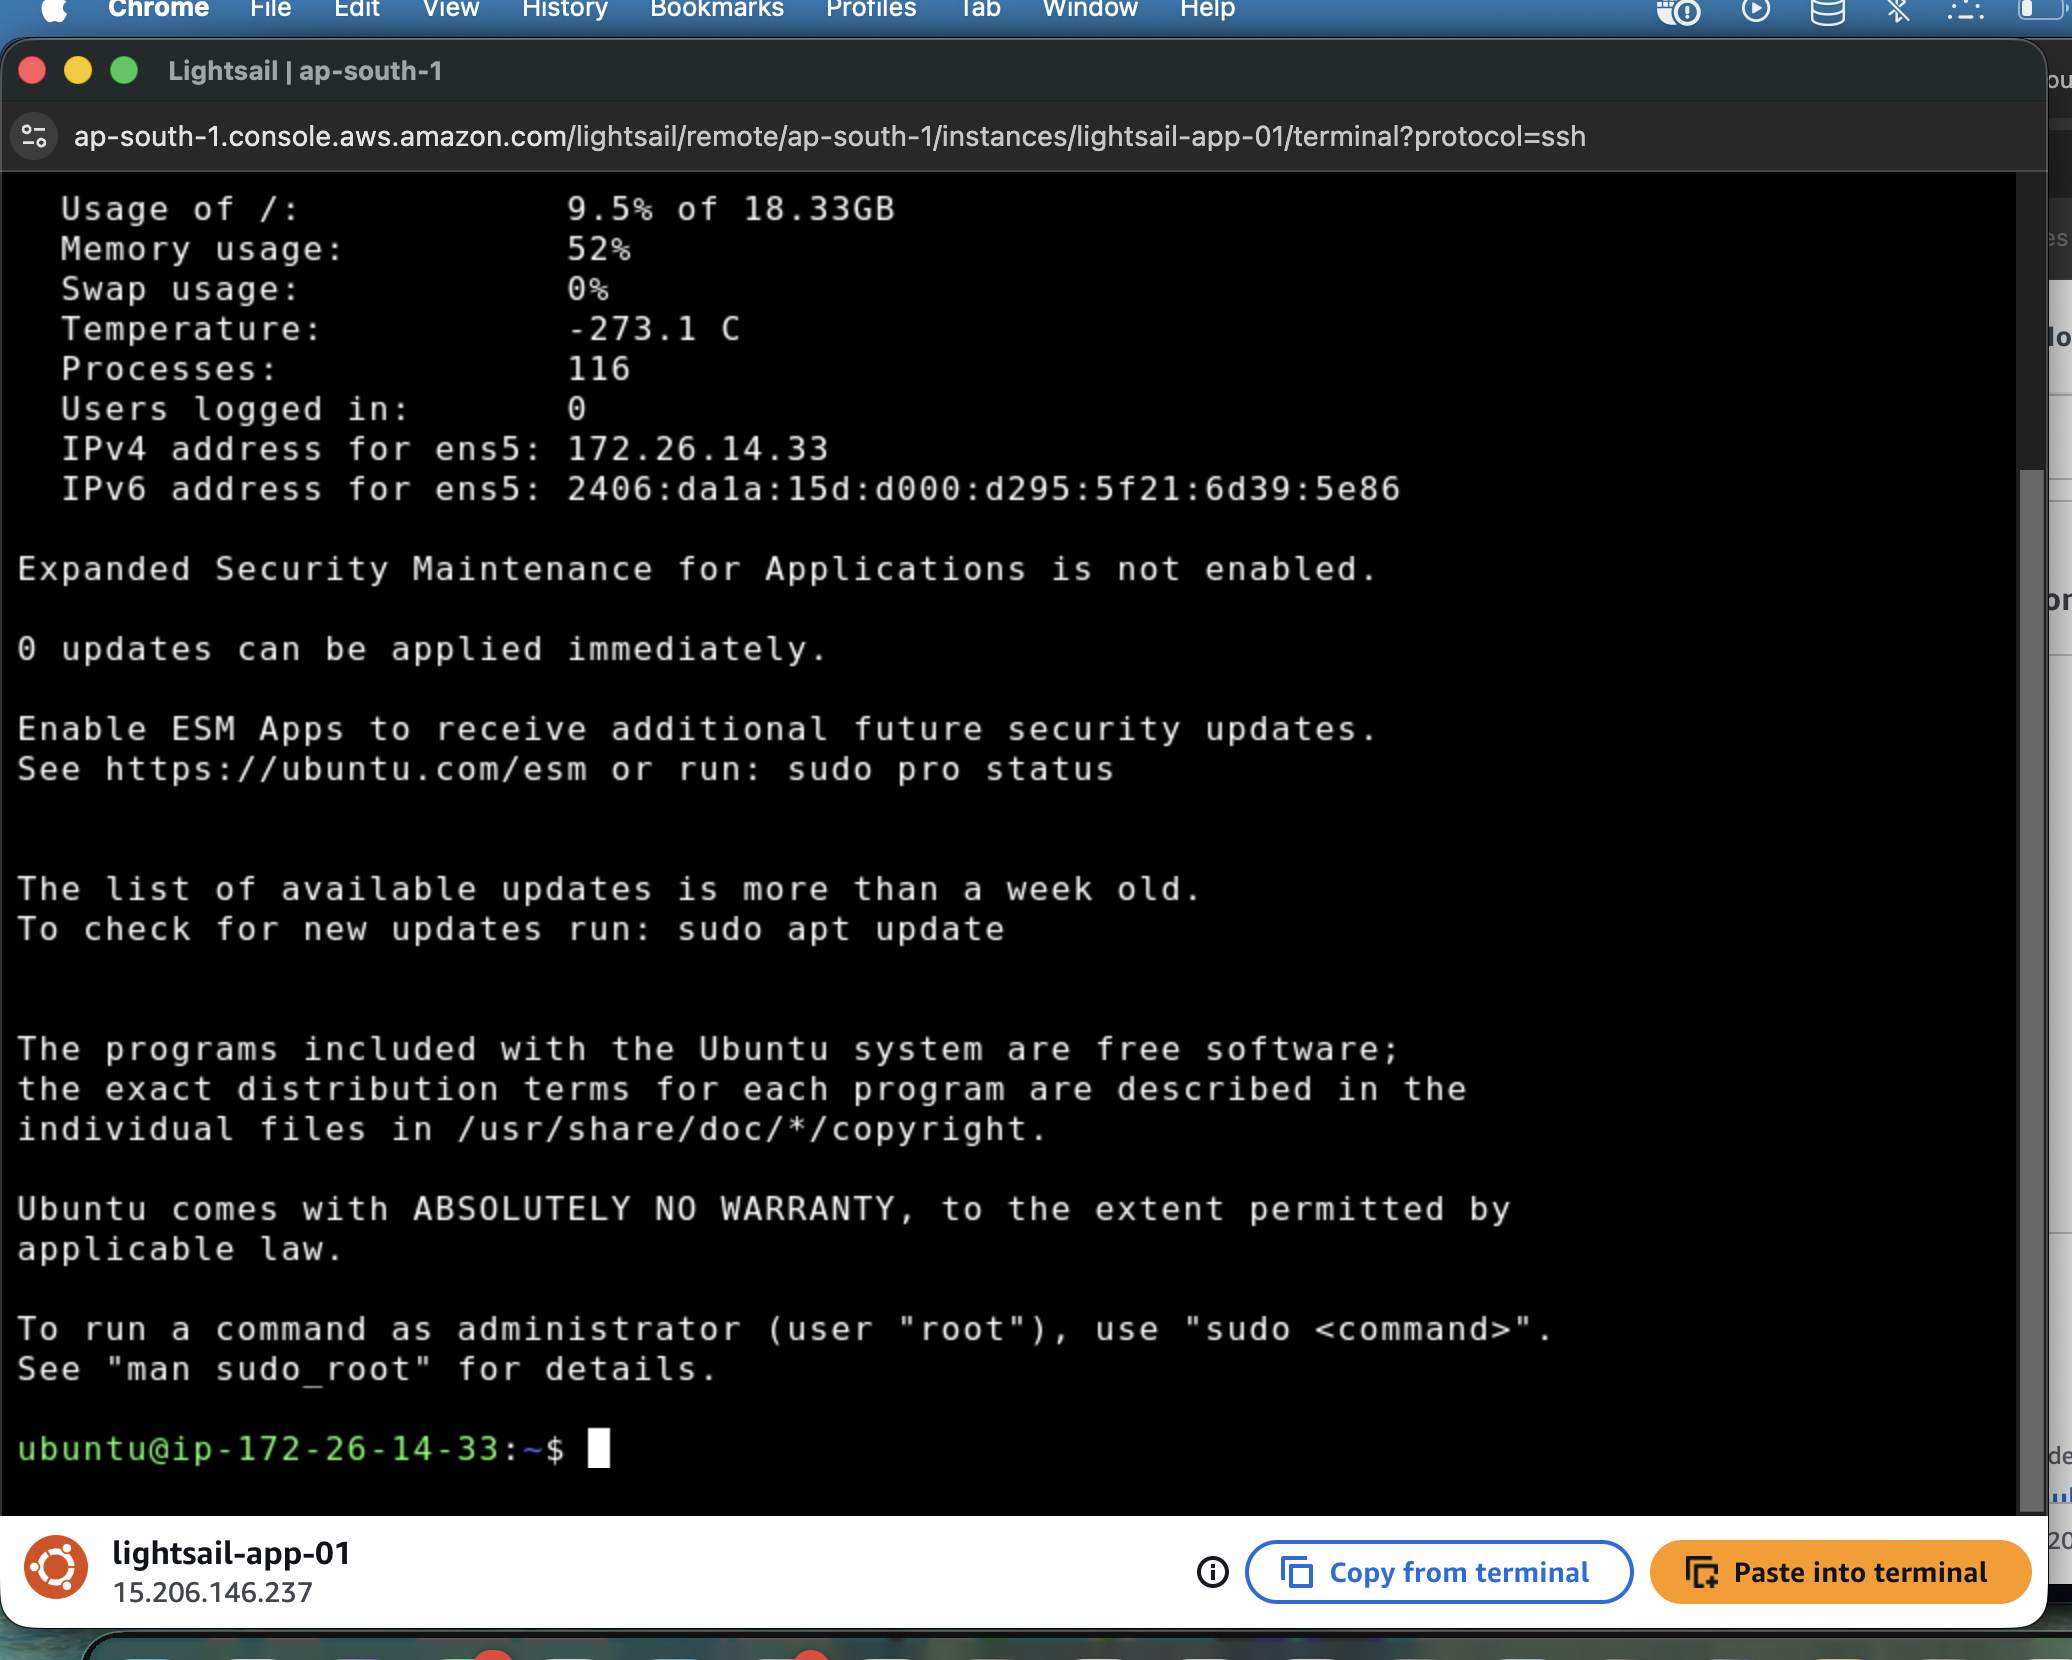 Figure 4 — SSH session and initial server information.
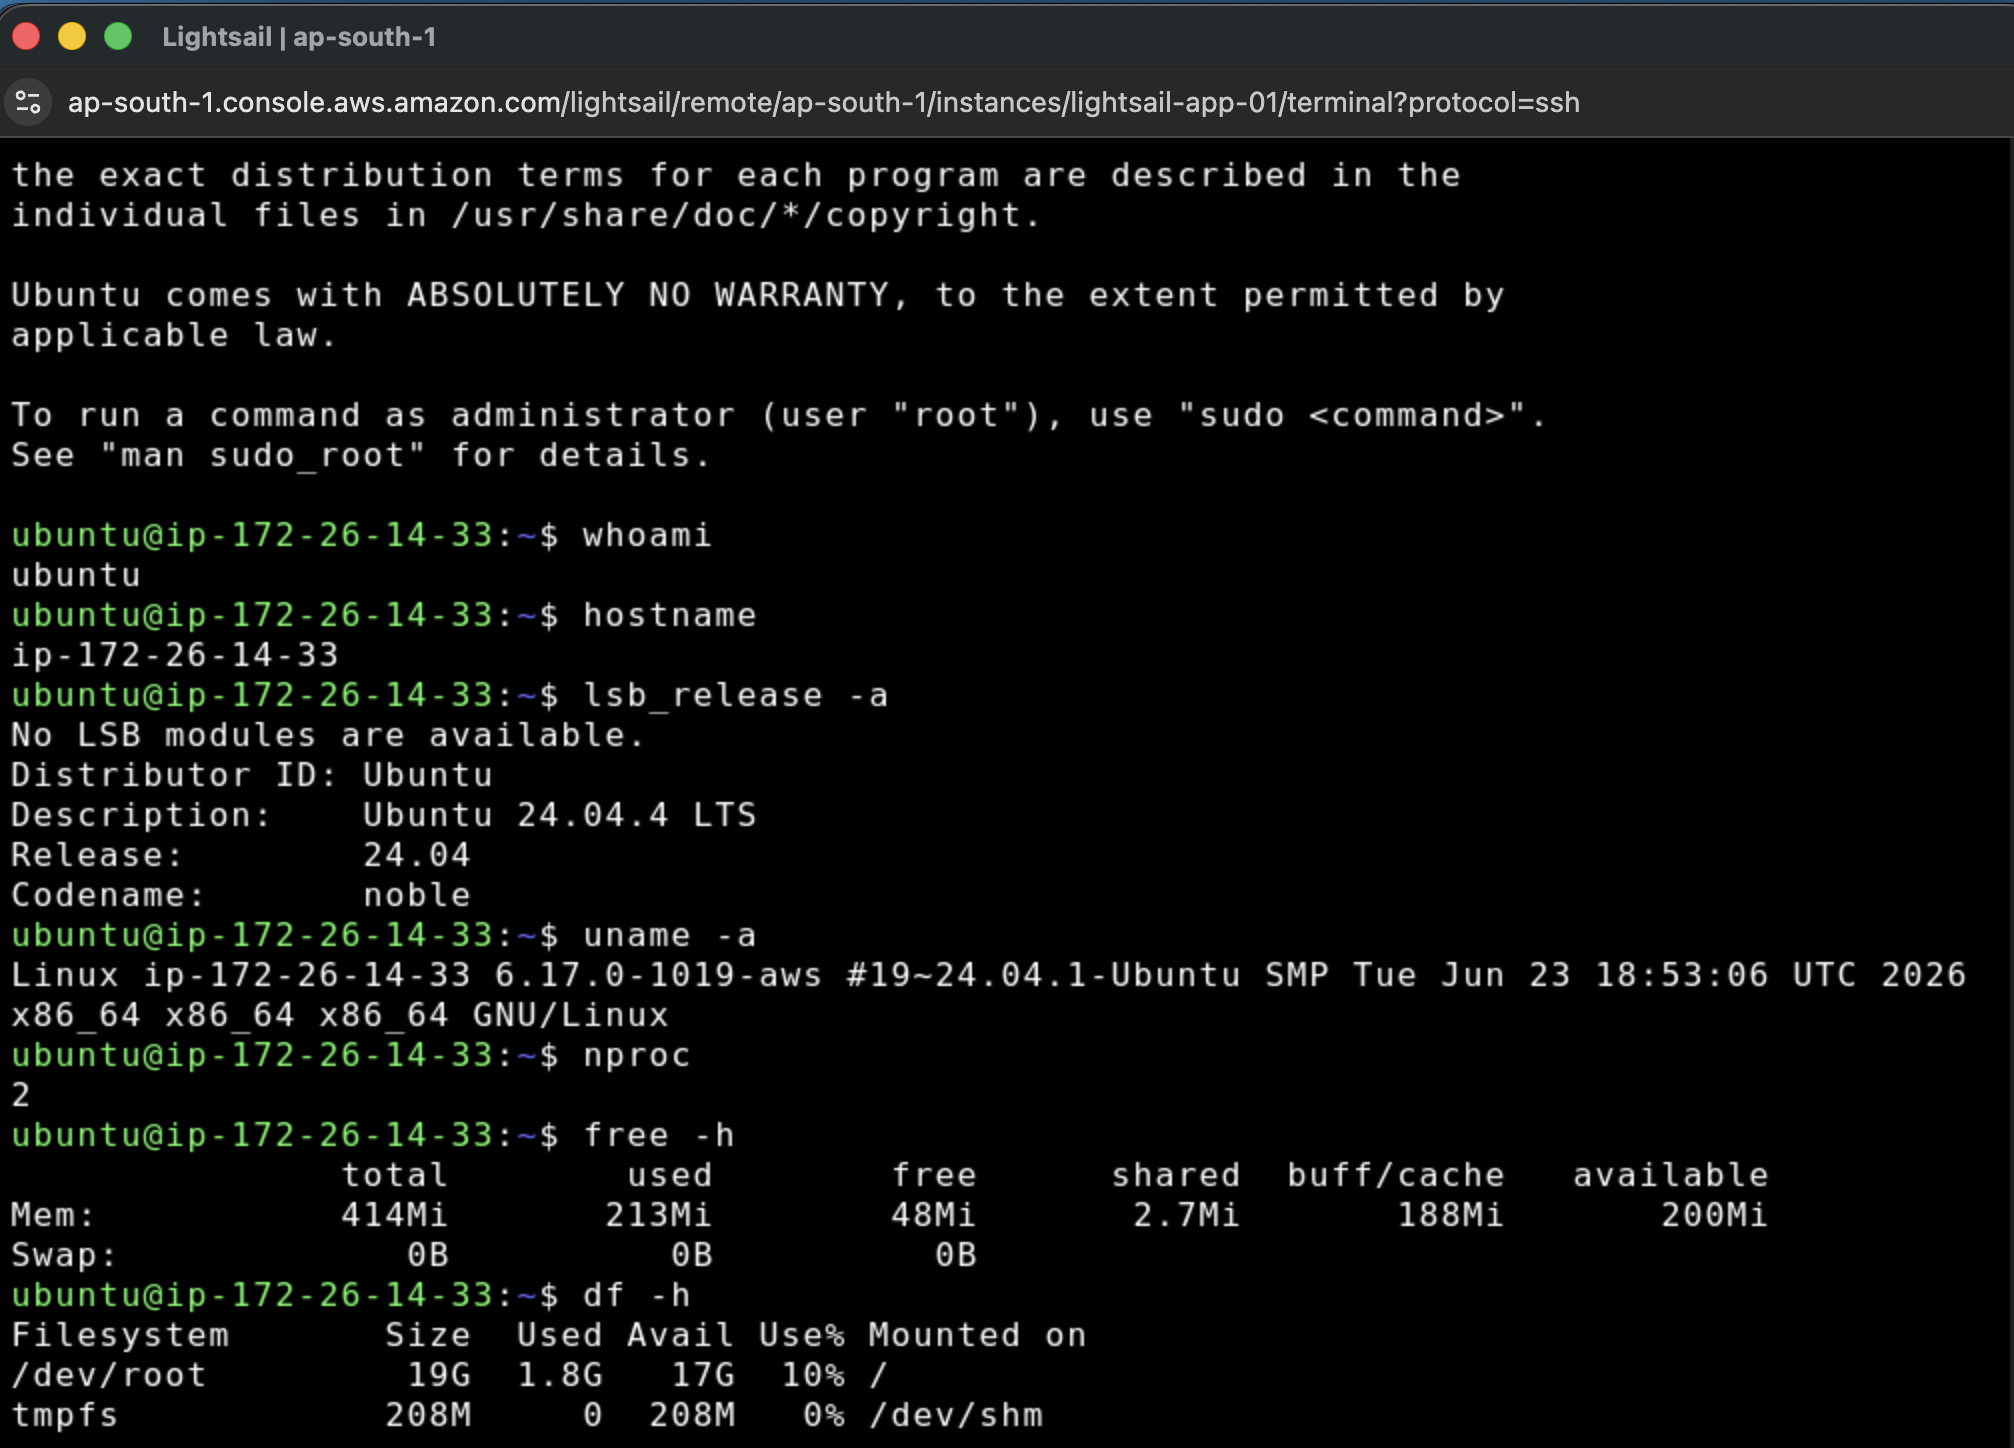 Figure 5 — Ubuntu 24.04.4 LTS, Linux kernel 6.17, CPU, memory, disk, and networking verification.
Verification Commands Executed:
# Verify user and hostname
whoami
# ubuntu

hostname
# ip-172-26-14-33

# Check OS version and release
lsb_release -a
# Distributor ID: Ubuntu
# Description:    Ubuntu 24.04.4 LTS
# Release:        24.04
# Codename:       noble

# Check kernel and architecture
uname -a
# Linux ip-172-26-14-33 6.17.0-1019-aws #19~24.04.1-Ubuntu SMP Tue Jun 23 18:53:06 UTC 2026 x86_64

# Check available CPU cores
nproc
# 2

# Check RAM utilization
free -h
# Mem: 414Mi total, 213Mi used, 48Mi free, 188Mi buff/cache, 200Mi available

# Check disk space
df -h
# Filesystem      Size  Used Avail Use% Mounted on
# /dev/root        19G  1.8G   17G  10% /
Install Nginx on both servers. Then give each server a unique HTML response so that the Load Balancer's target selection is easily distinguishable during tests.
# Update package repositories and install Nginx
sudo apt update
sudo apt install nginx -y
On lightsail-app-01:
echo '<h1>Hello from Lightsail App Server 01</h1>' | sudo tee /var/www/html/index.html
On lightsail-app-02:
echo '<h1>Hello from Lightsail App Server 02</h1>' | sudo tee /var/www/html/index.html
Direct Target Verification:
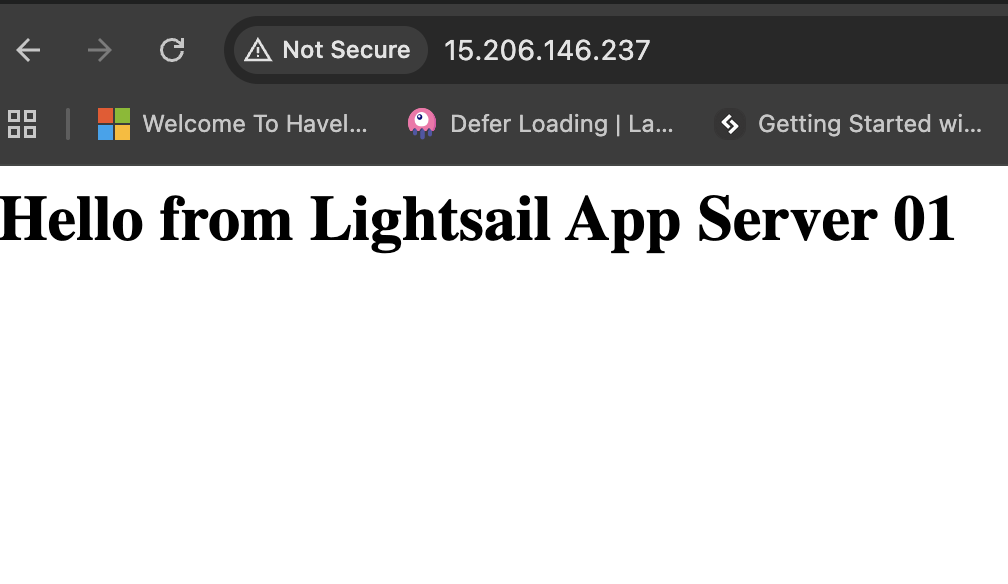 Figure 6 — Direct test of
 lightsail-app-01 (http://15.206.146.237) returning Server 01.
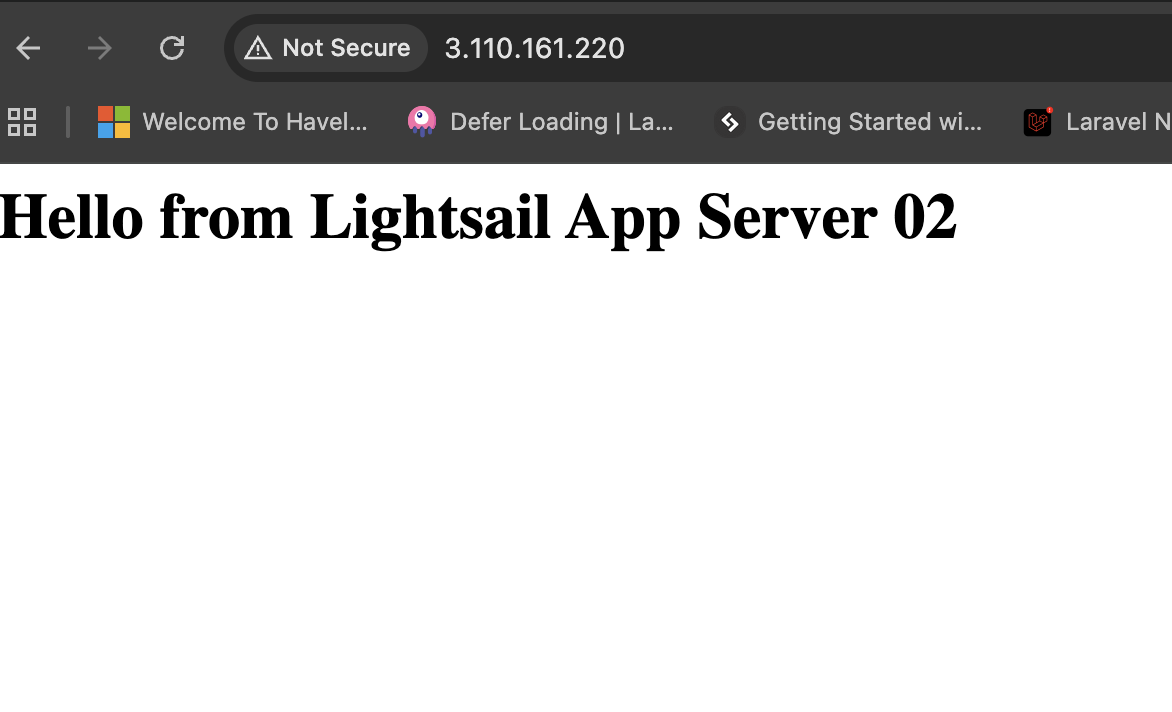 Figure 7 — Direct test of
 lightsail-app-02 (http://3.110.161.220) returning Server 02.
6. Create the Lightsail Load Balancer
- Open Lightsail ➔ Networking ➔ Create load balancer.
- Select Mumbai (
ap-south-1).
- Name the load balancer
lightsail-production-lb.
- Use the default HTTP listener on port 80 for the initial test.
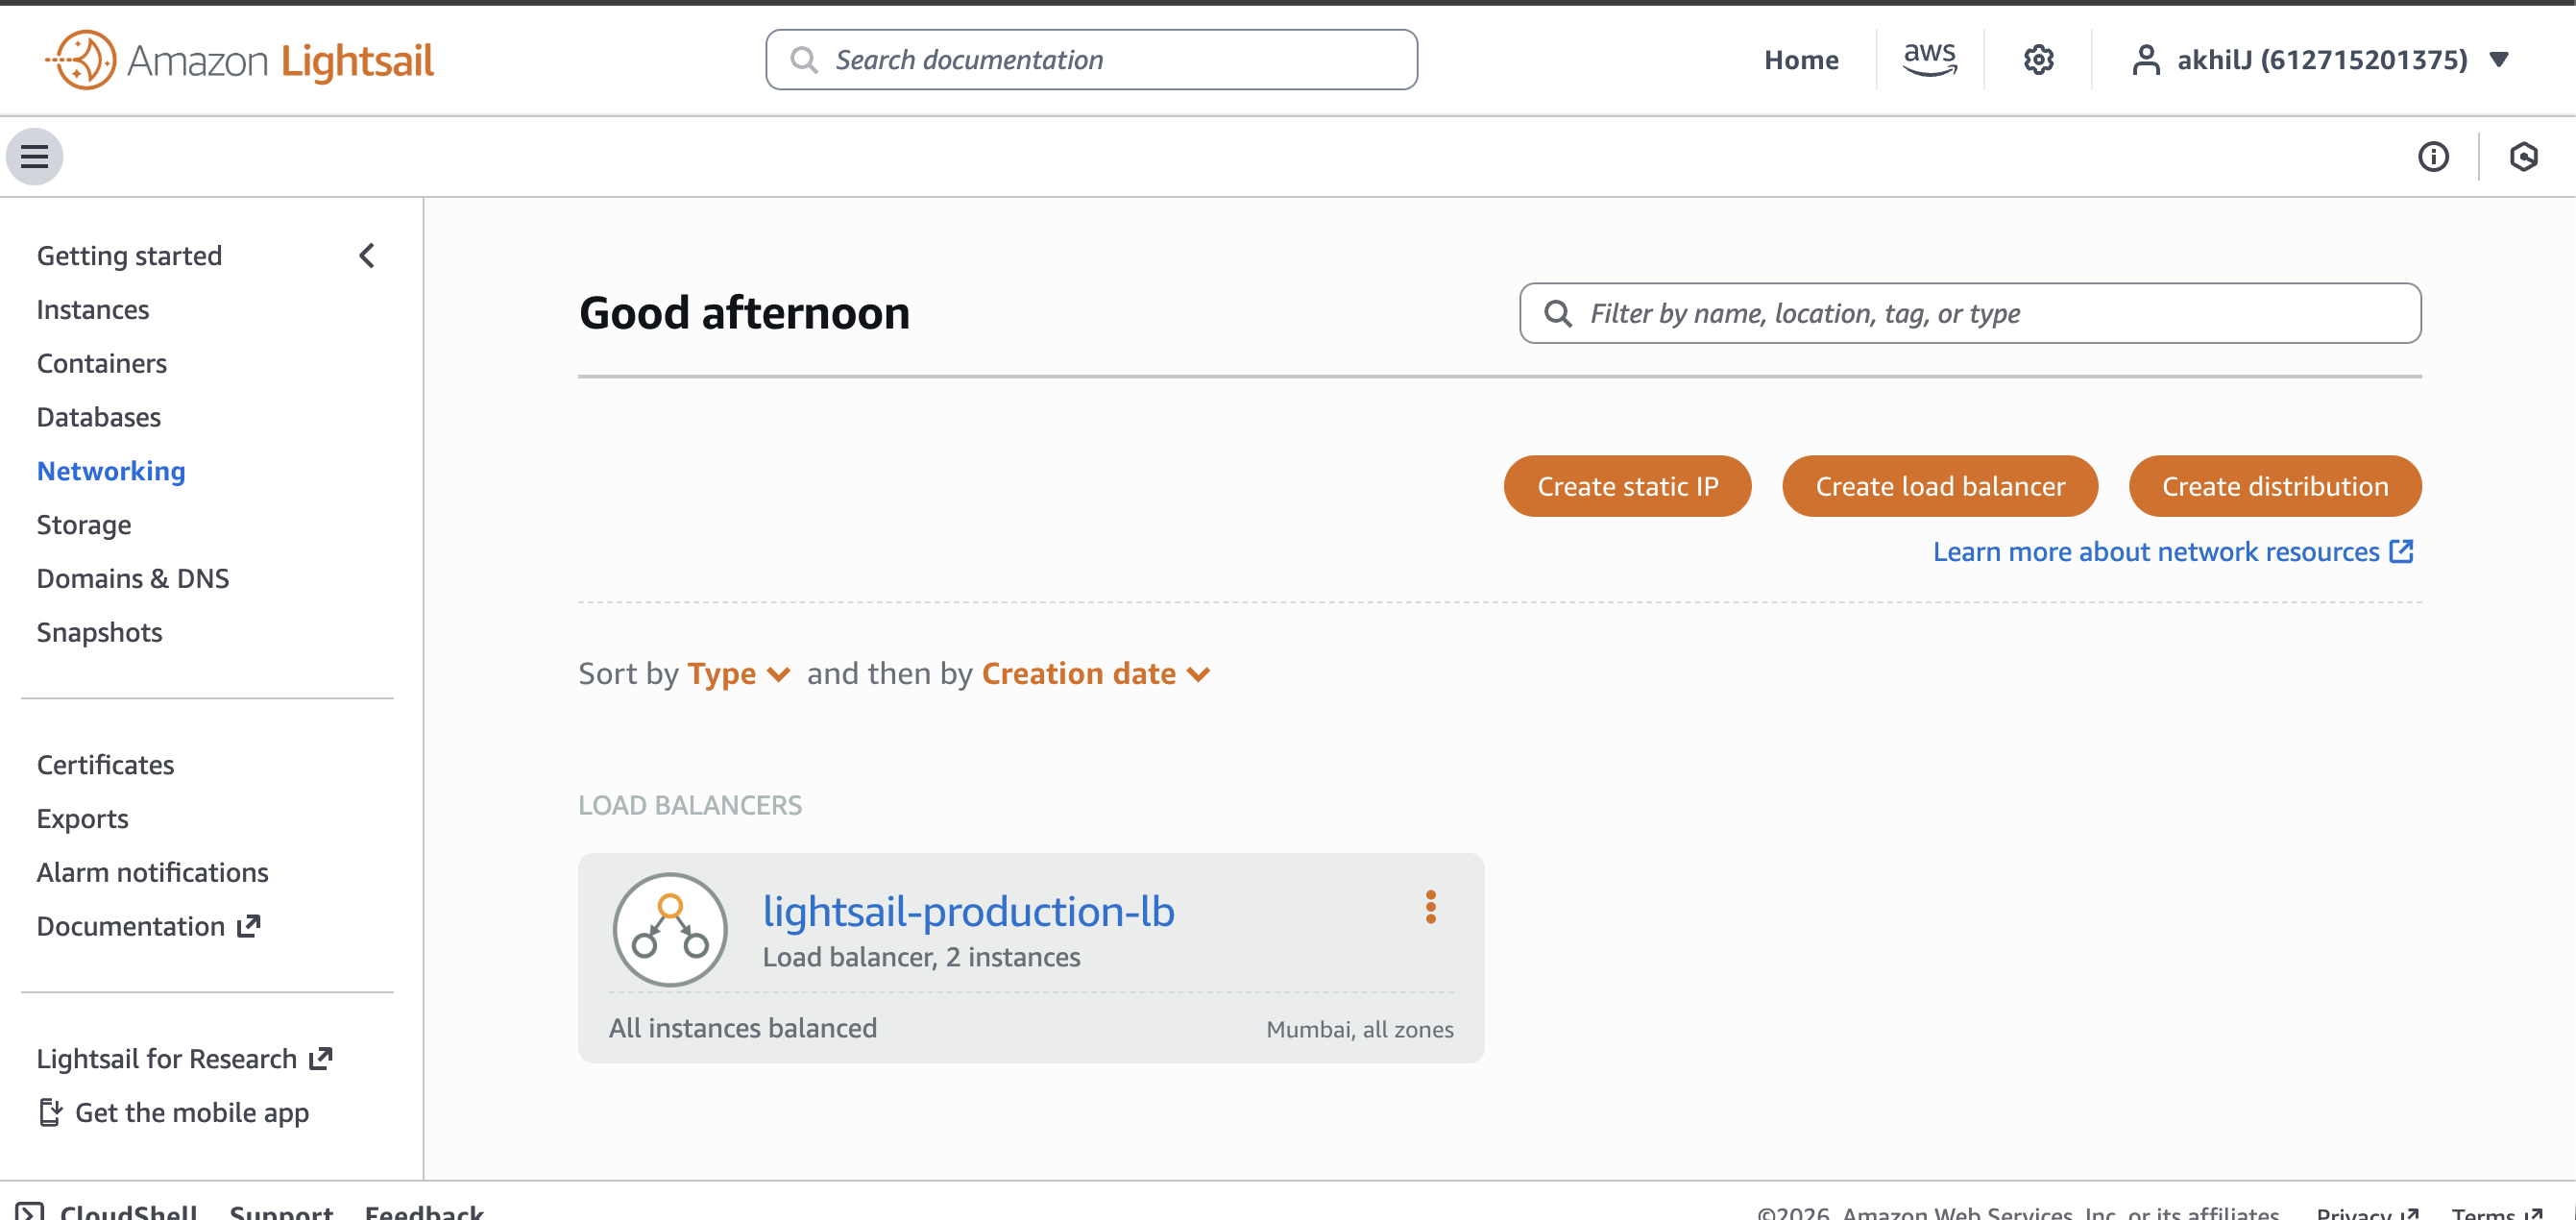 Figure 8 —
 lightsail-production-lb created in the Lightsail Networking section.
7. Attach Both Instances as Targets
Under the Load Balancer management console, attach both lightsail-app-01 and lightsail-app-02. The Load Balancer can now distribute requests between registered targets.
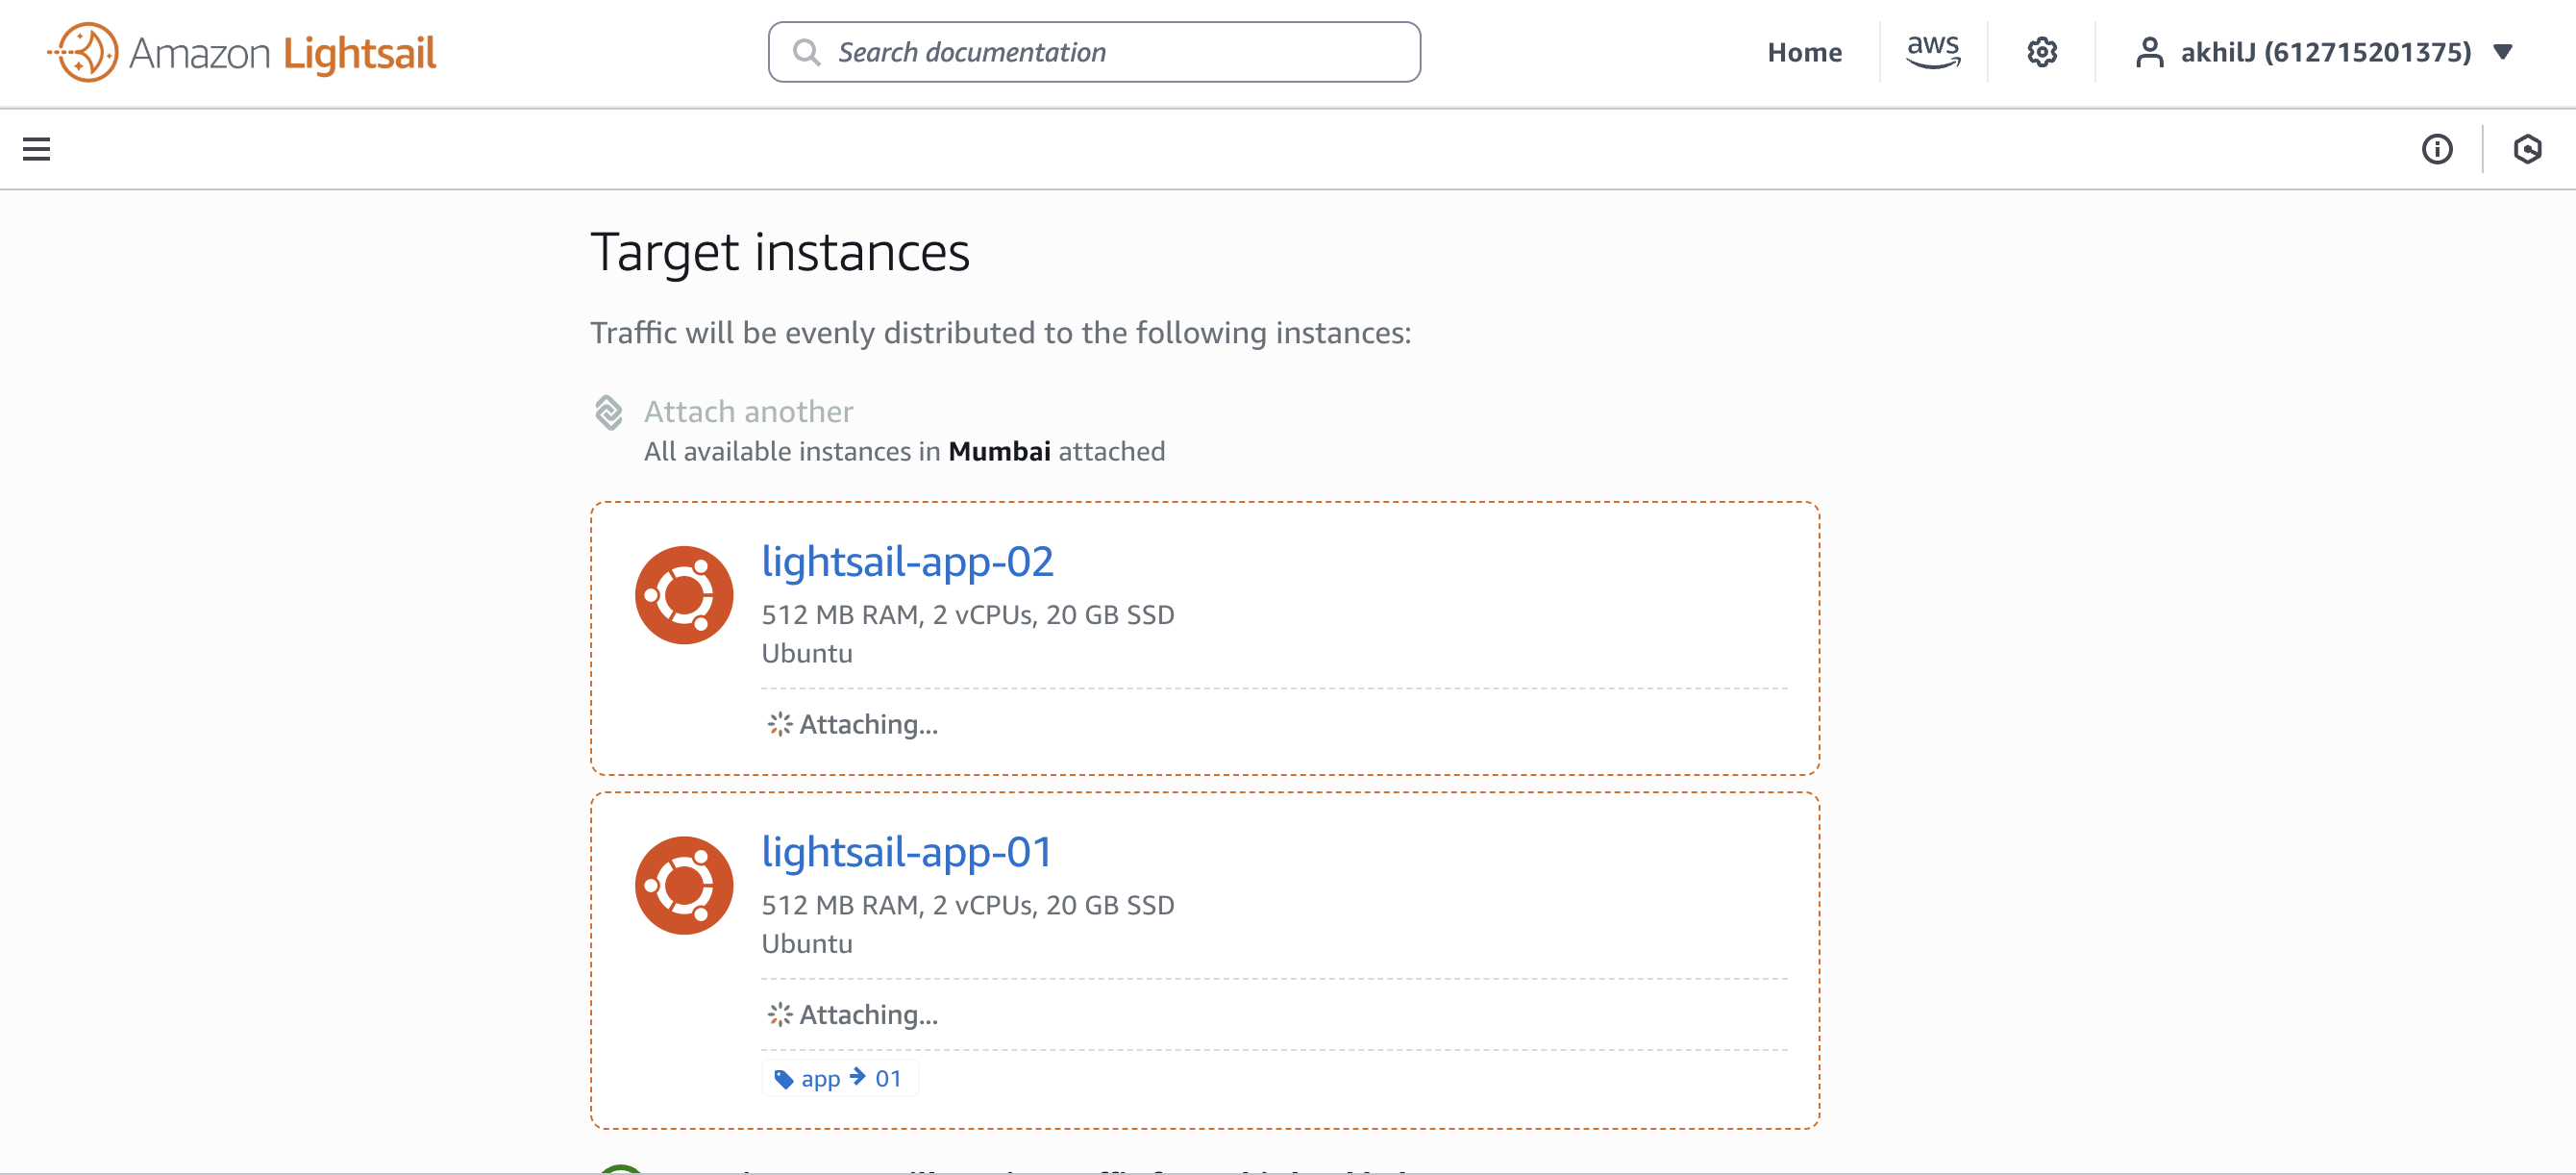 Figure 9 — Both instances visible in the Load Balancer target list.
8. Verify Target Health Checks
The target view reports Health Check: Passed for both instances. This confirms that both backend nodes are responsive and ready to handle traffic.
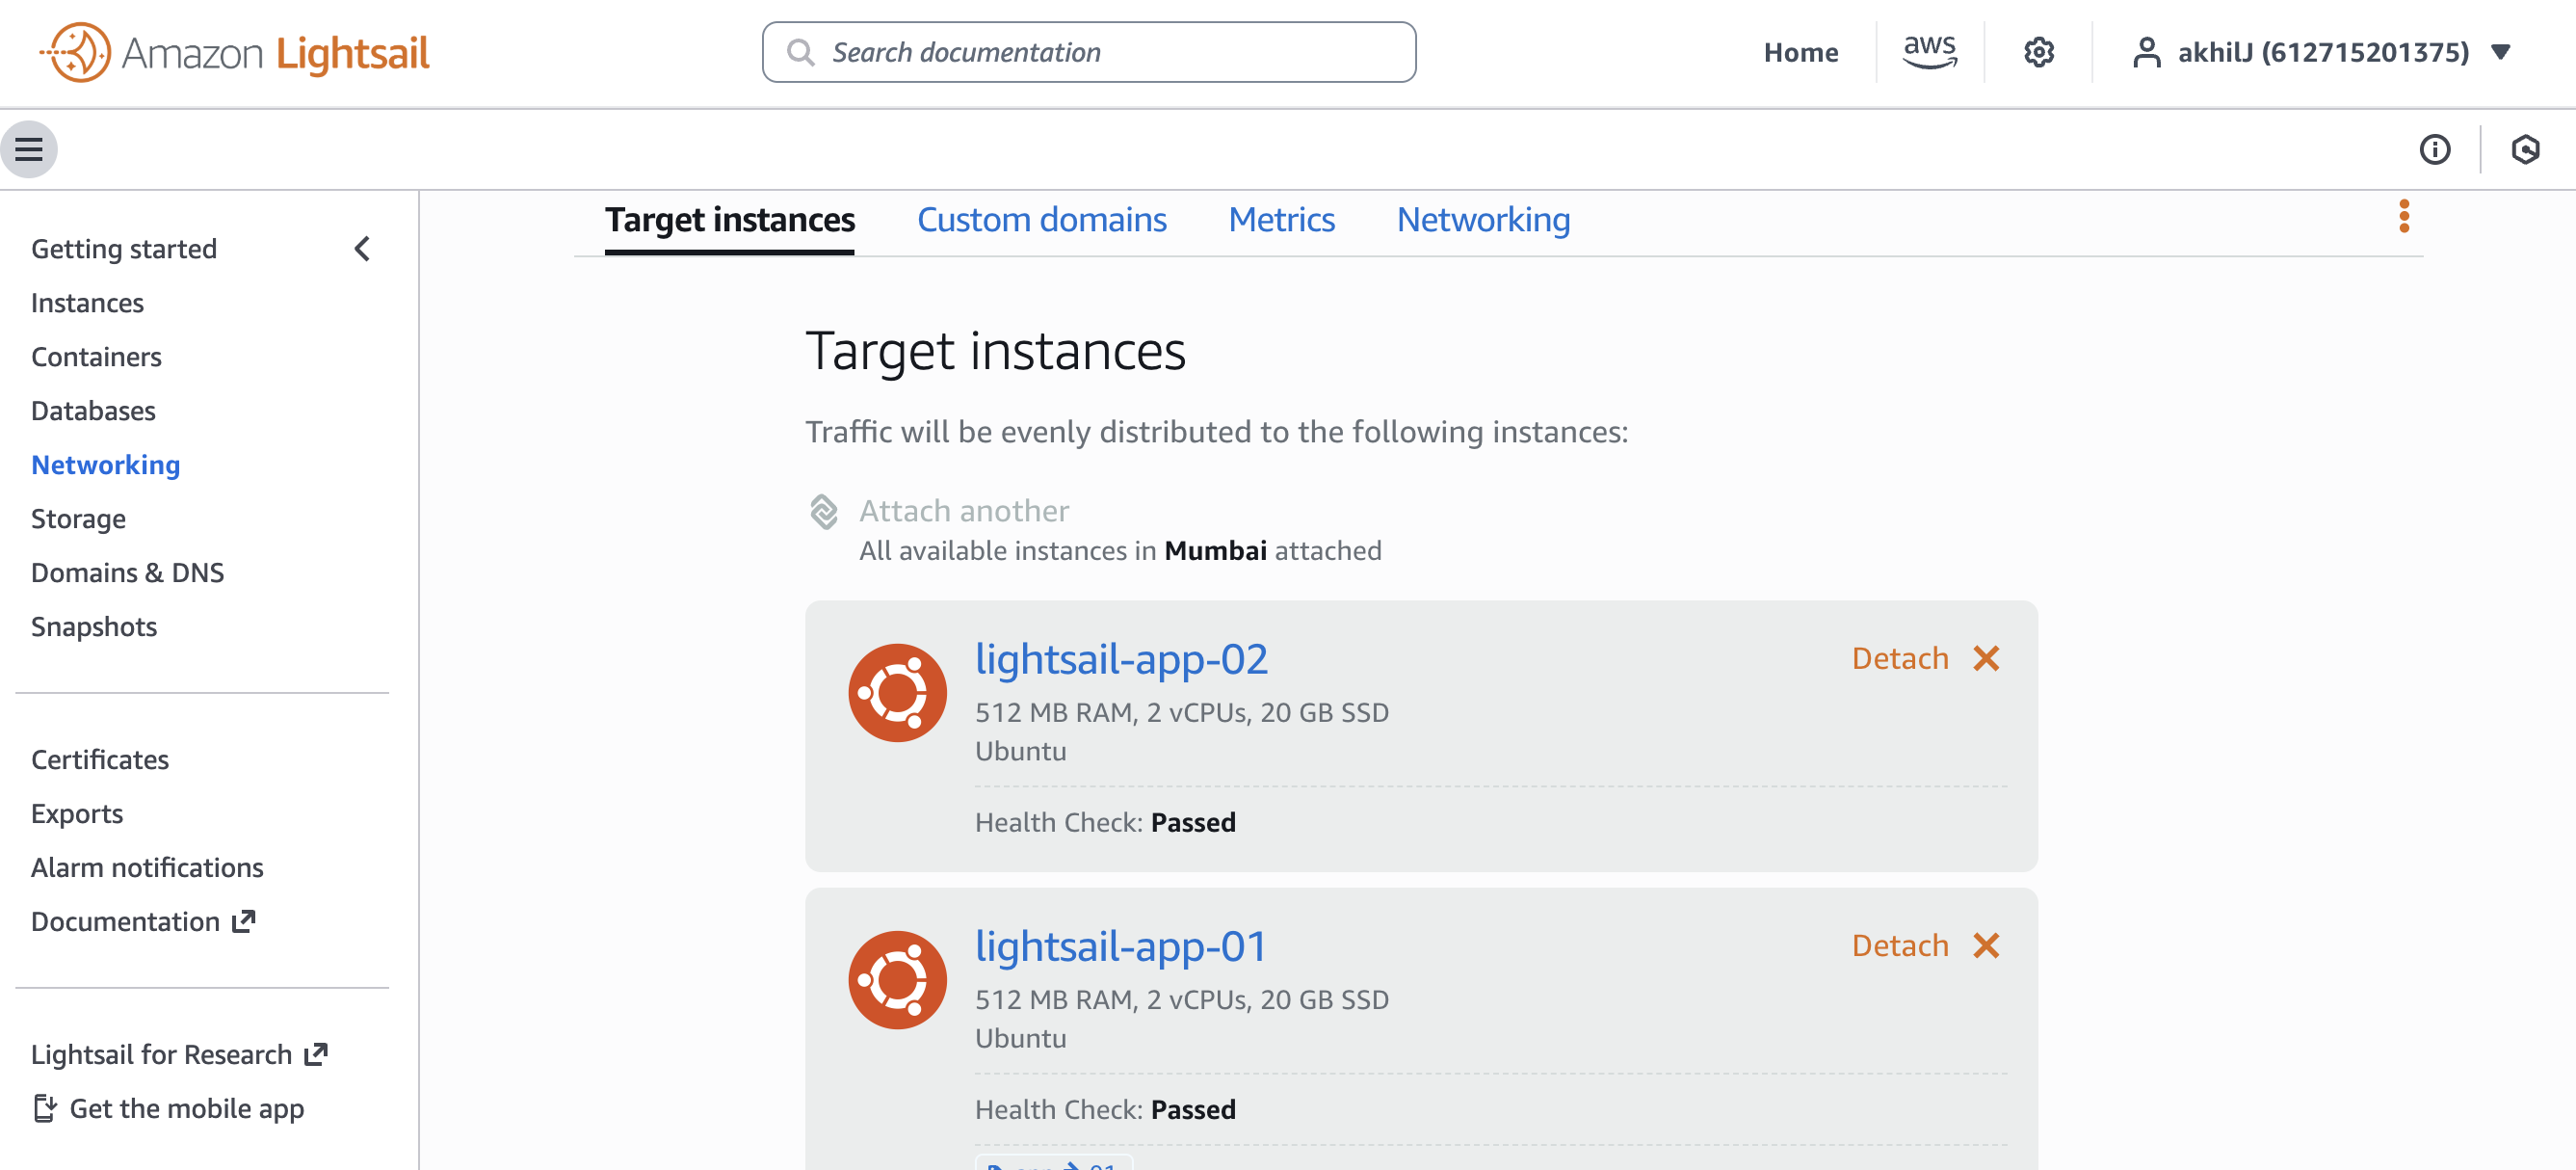 Figure 10 — Health checks passed for
 lightsail-app-02 and lightsail-app-01.
9. Test the Load Balancer Endpoint
Use the canonical DNS name assigned by AWS (24d545c654dd65c3885a73f8168e8420-344670179.ap-south-1.elb.amazonaws.com) instead of the individual instance IPs.
Refreshing the endpoint proves that the Load Balancer routes traffic across both healthy backends:
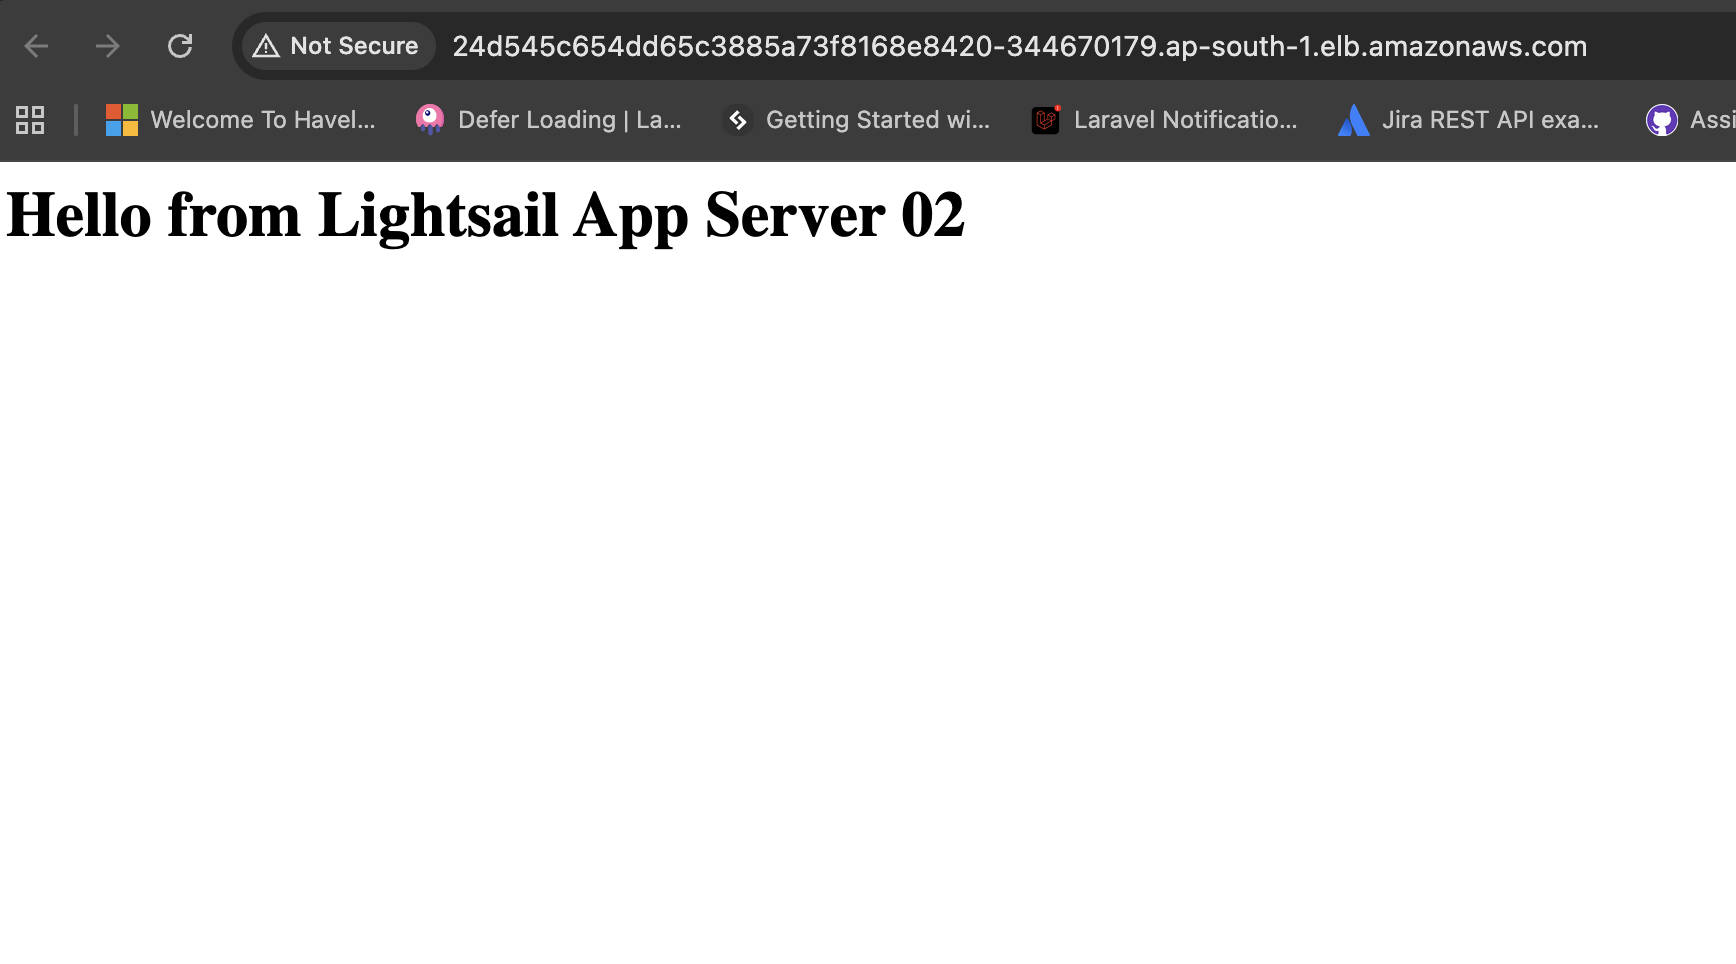 Figure 11 — Load Balancer DNS endpoint returning App Server 02.
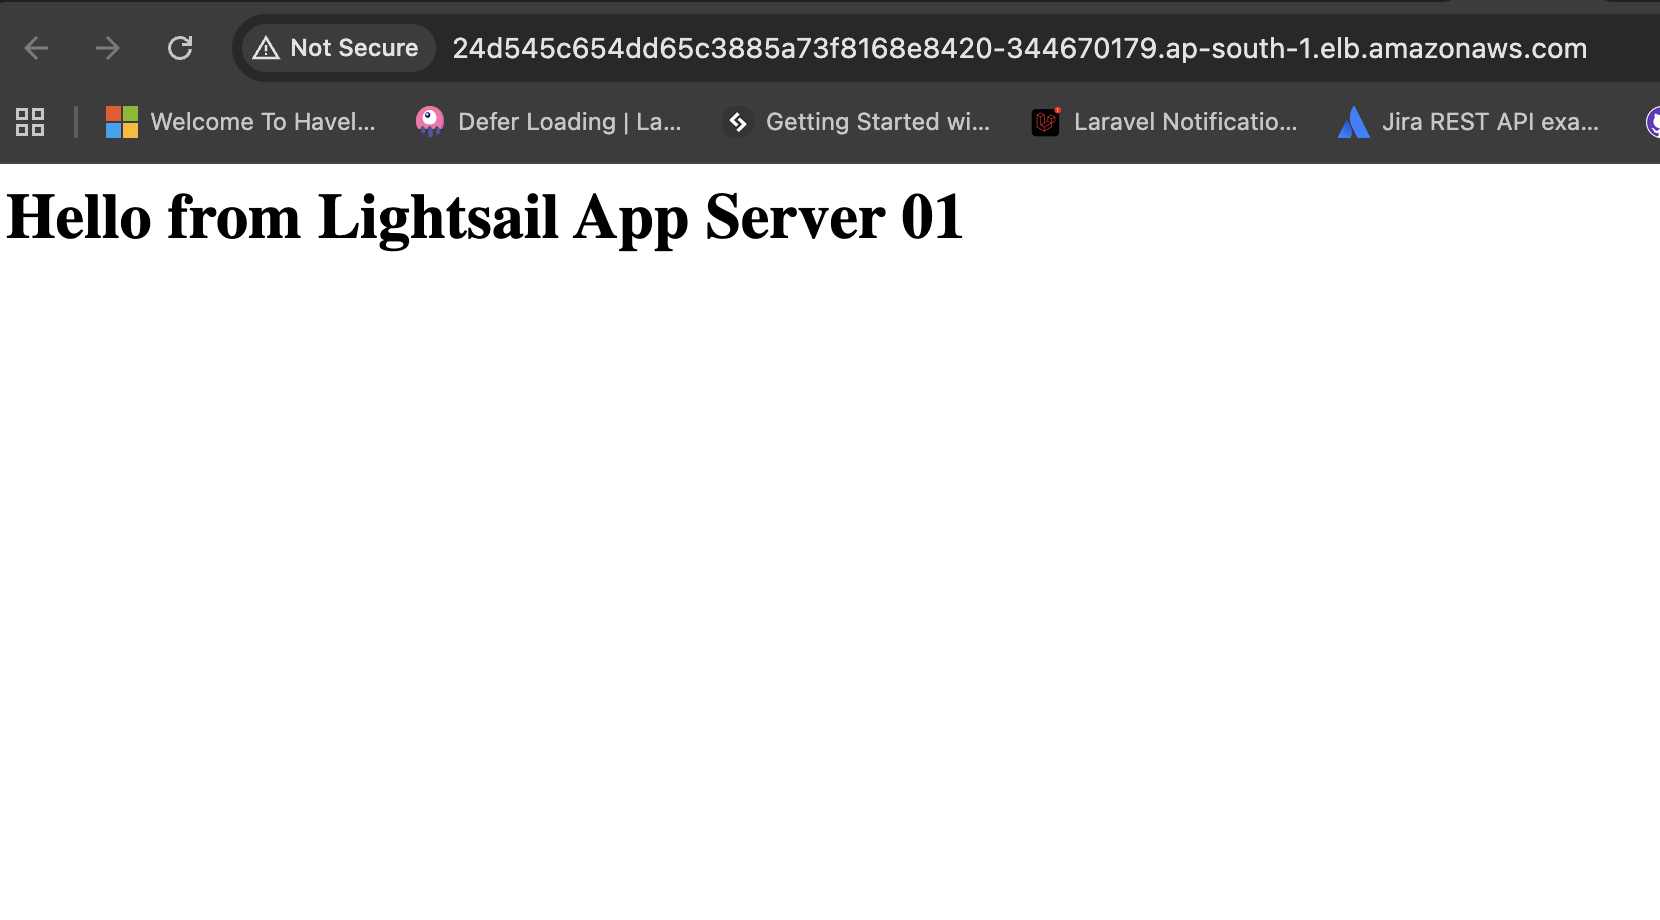 Figure 12 — The same Load Balancer endpoint returning App Server 01 on subsequent requests.
10. Failure and Recovery Test
To demonstrate why automated health checks matter, simulate a failure by stopping Nginx on one backend:
# Simulate failure on one node
sudo systemctl stop nginx
sudo systemctl status nginx
The target quickly transitions to unhealthy, and the Load Balancer stops routing user traffic to that node.
# Restore the service
sudo systemctl start nginx
Once Nginx is restored, the instance passes two consecutive health checks and traffic seamlessly resumes.
11. Final Production Environment
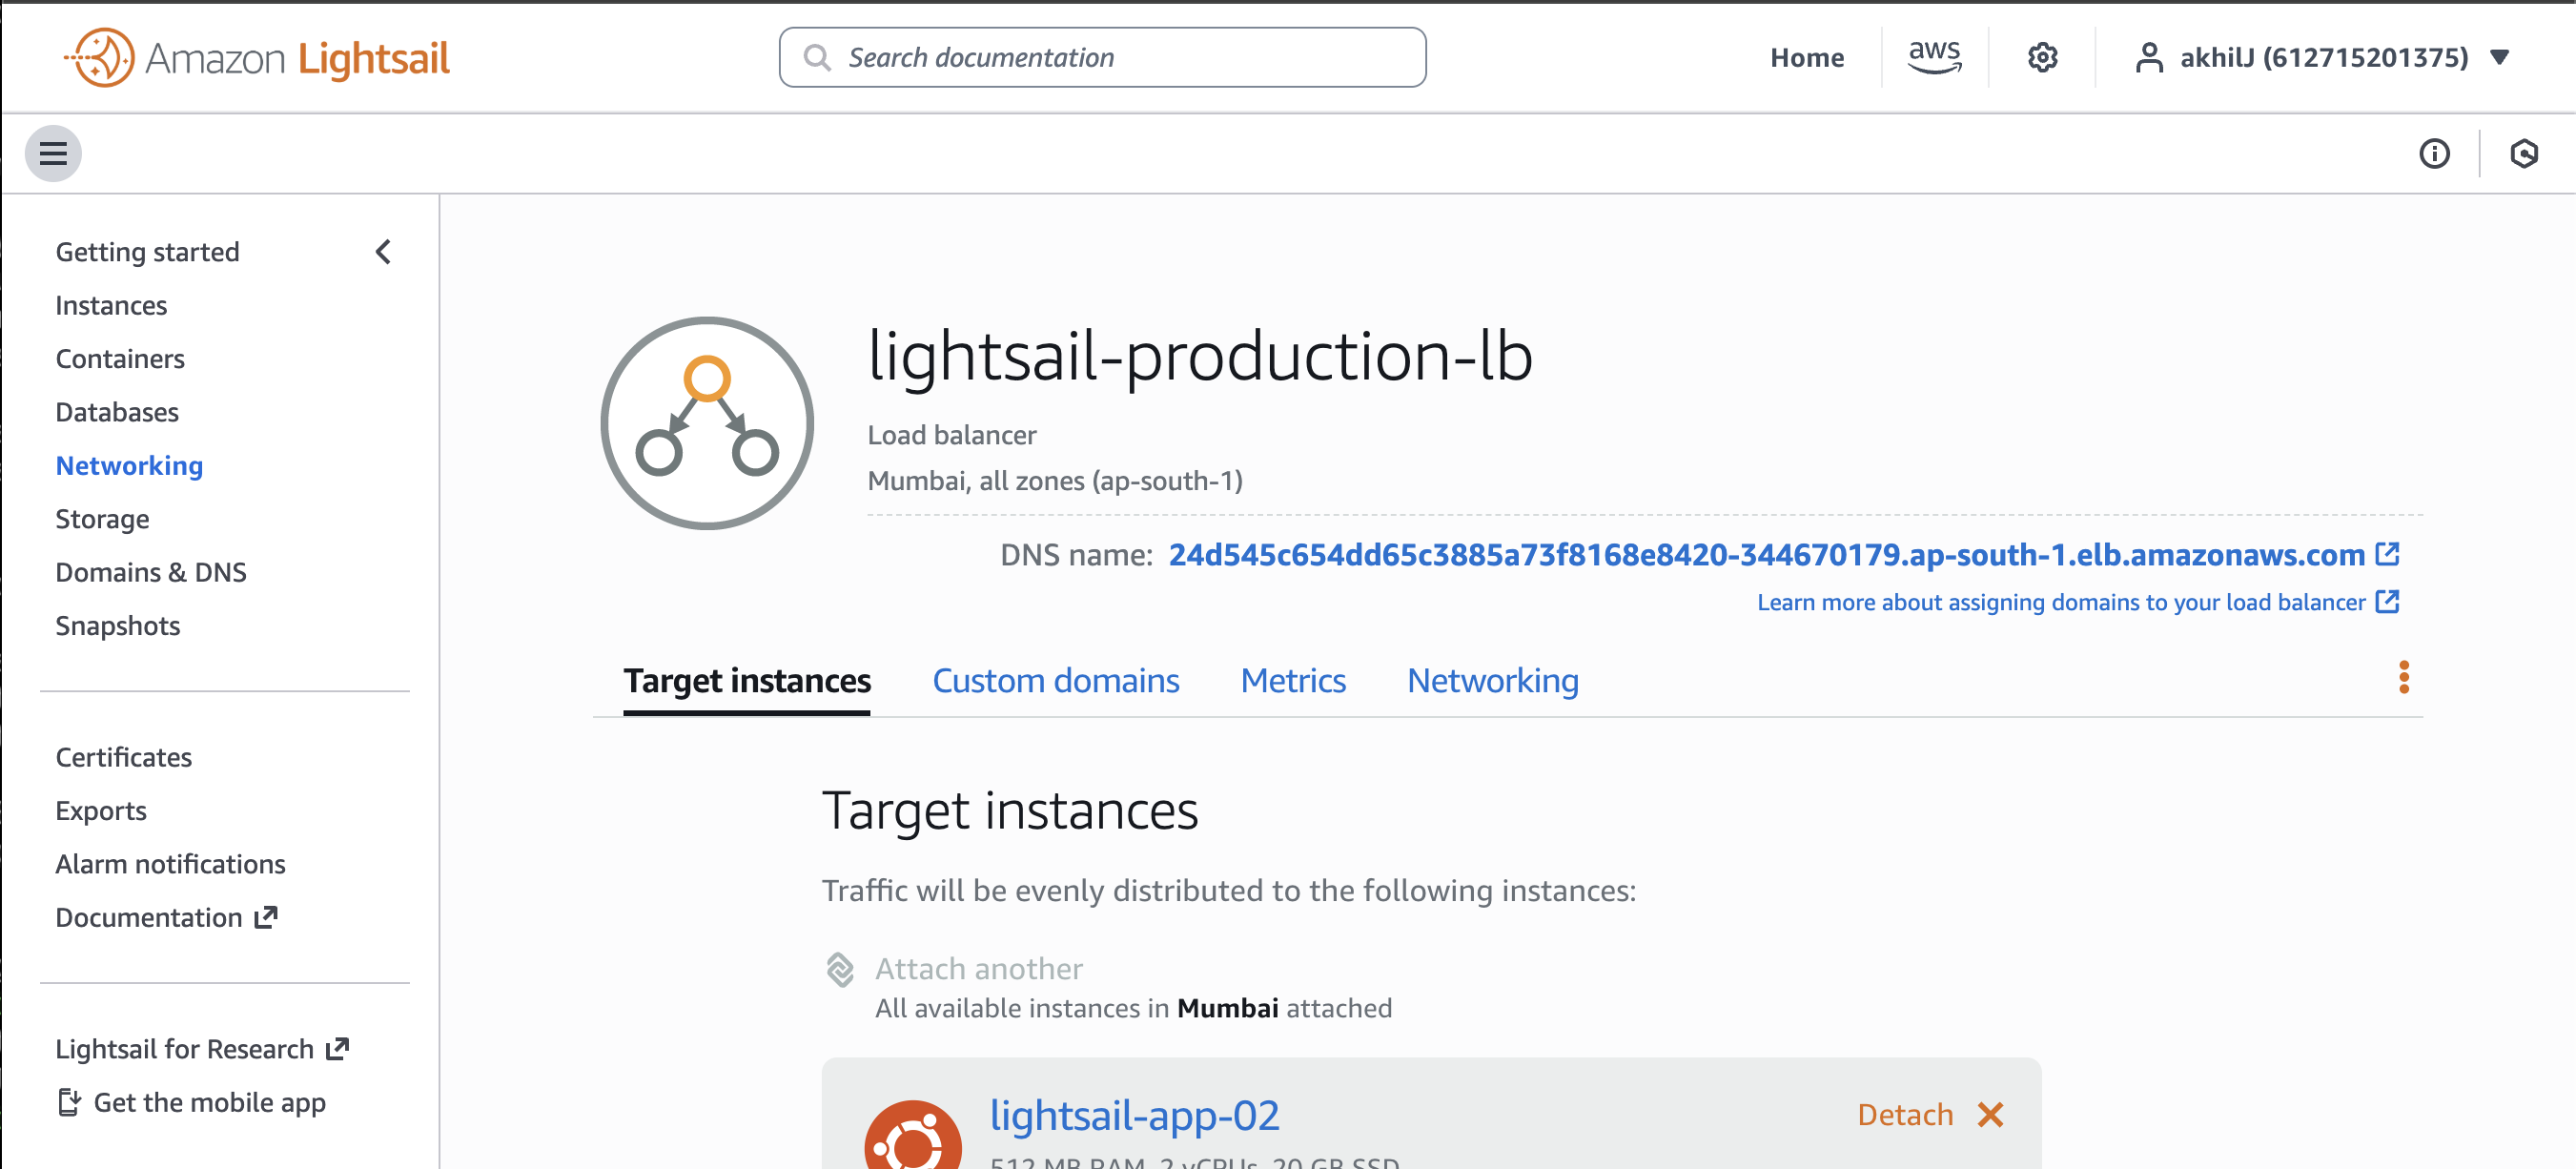 Figure 13 — Final Load Balancer target configuration.
| Component |
Resource |
Role |
| Public Entry |
lightsail-production-lb |
Single unified HTTP/HTTPS endpoint |
| Backend 1 |
lightsail-app-01 |
Ubuntu 24.04 + Nginx (15.206.146.237) |
| Backend 2 |
lightsail-app-02 |
Ubuntu 24.04 + Nginx (3.110.161.220) |
| Health Checks |
Lightsail Health Monitor |
Determines real-time target availability |
12. Professional Next Steps & Best Practices